After some poor and wet weather I started getting some issues with the mount.
The first symptom was a lot of condensation in the dome and on the steelwork of the mount itself. Buth this was not unexpected and dealt with by the use of an old towel.
Then the mount stopped working! I immediately got in touch with First Light Optics, resullting in it getting packed away and sent off for examination. The verdict was - nothing wrong with it, it's working perfectly.
Further examination and looking for the source of the condensation showed that the rubber flooring was the source. The sealing between the walls and the old observatory floor was leaking in one or two areas and the tiles had been soaking up all the water. So as a stop gap I removed them.
The tongue and groove flooring of the original build had warped and dished slightly, so the observatory walls were not sitting on a flat surface, they were sitting on slight ridges. Some external felting improved things significantly, but some water was still getting in.
So I planned the fitting of a false floor to eliminate the chance of the rubber matting soaking up any residual leaks.
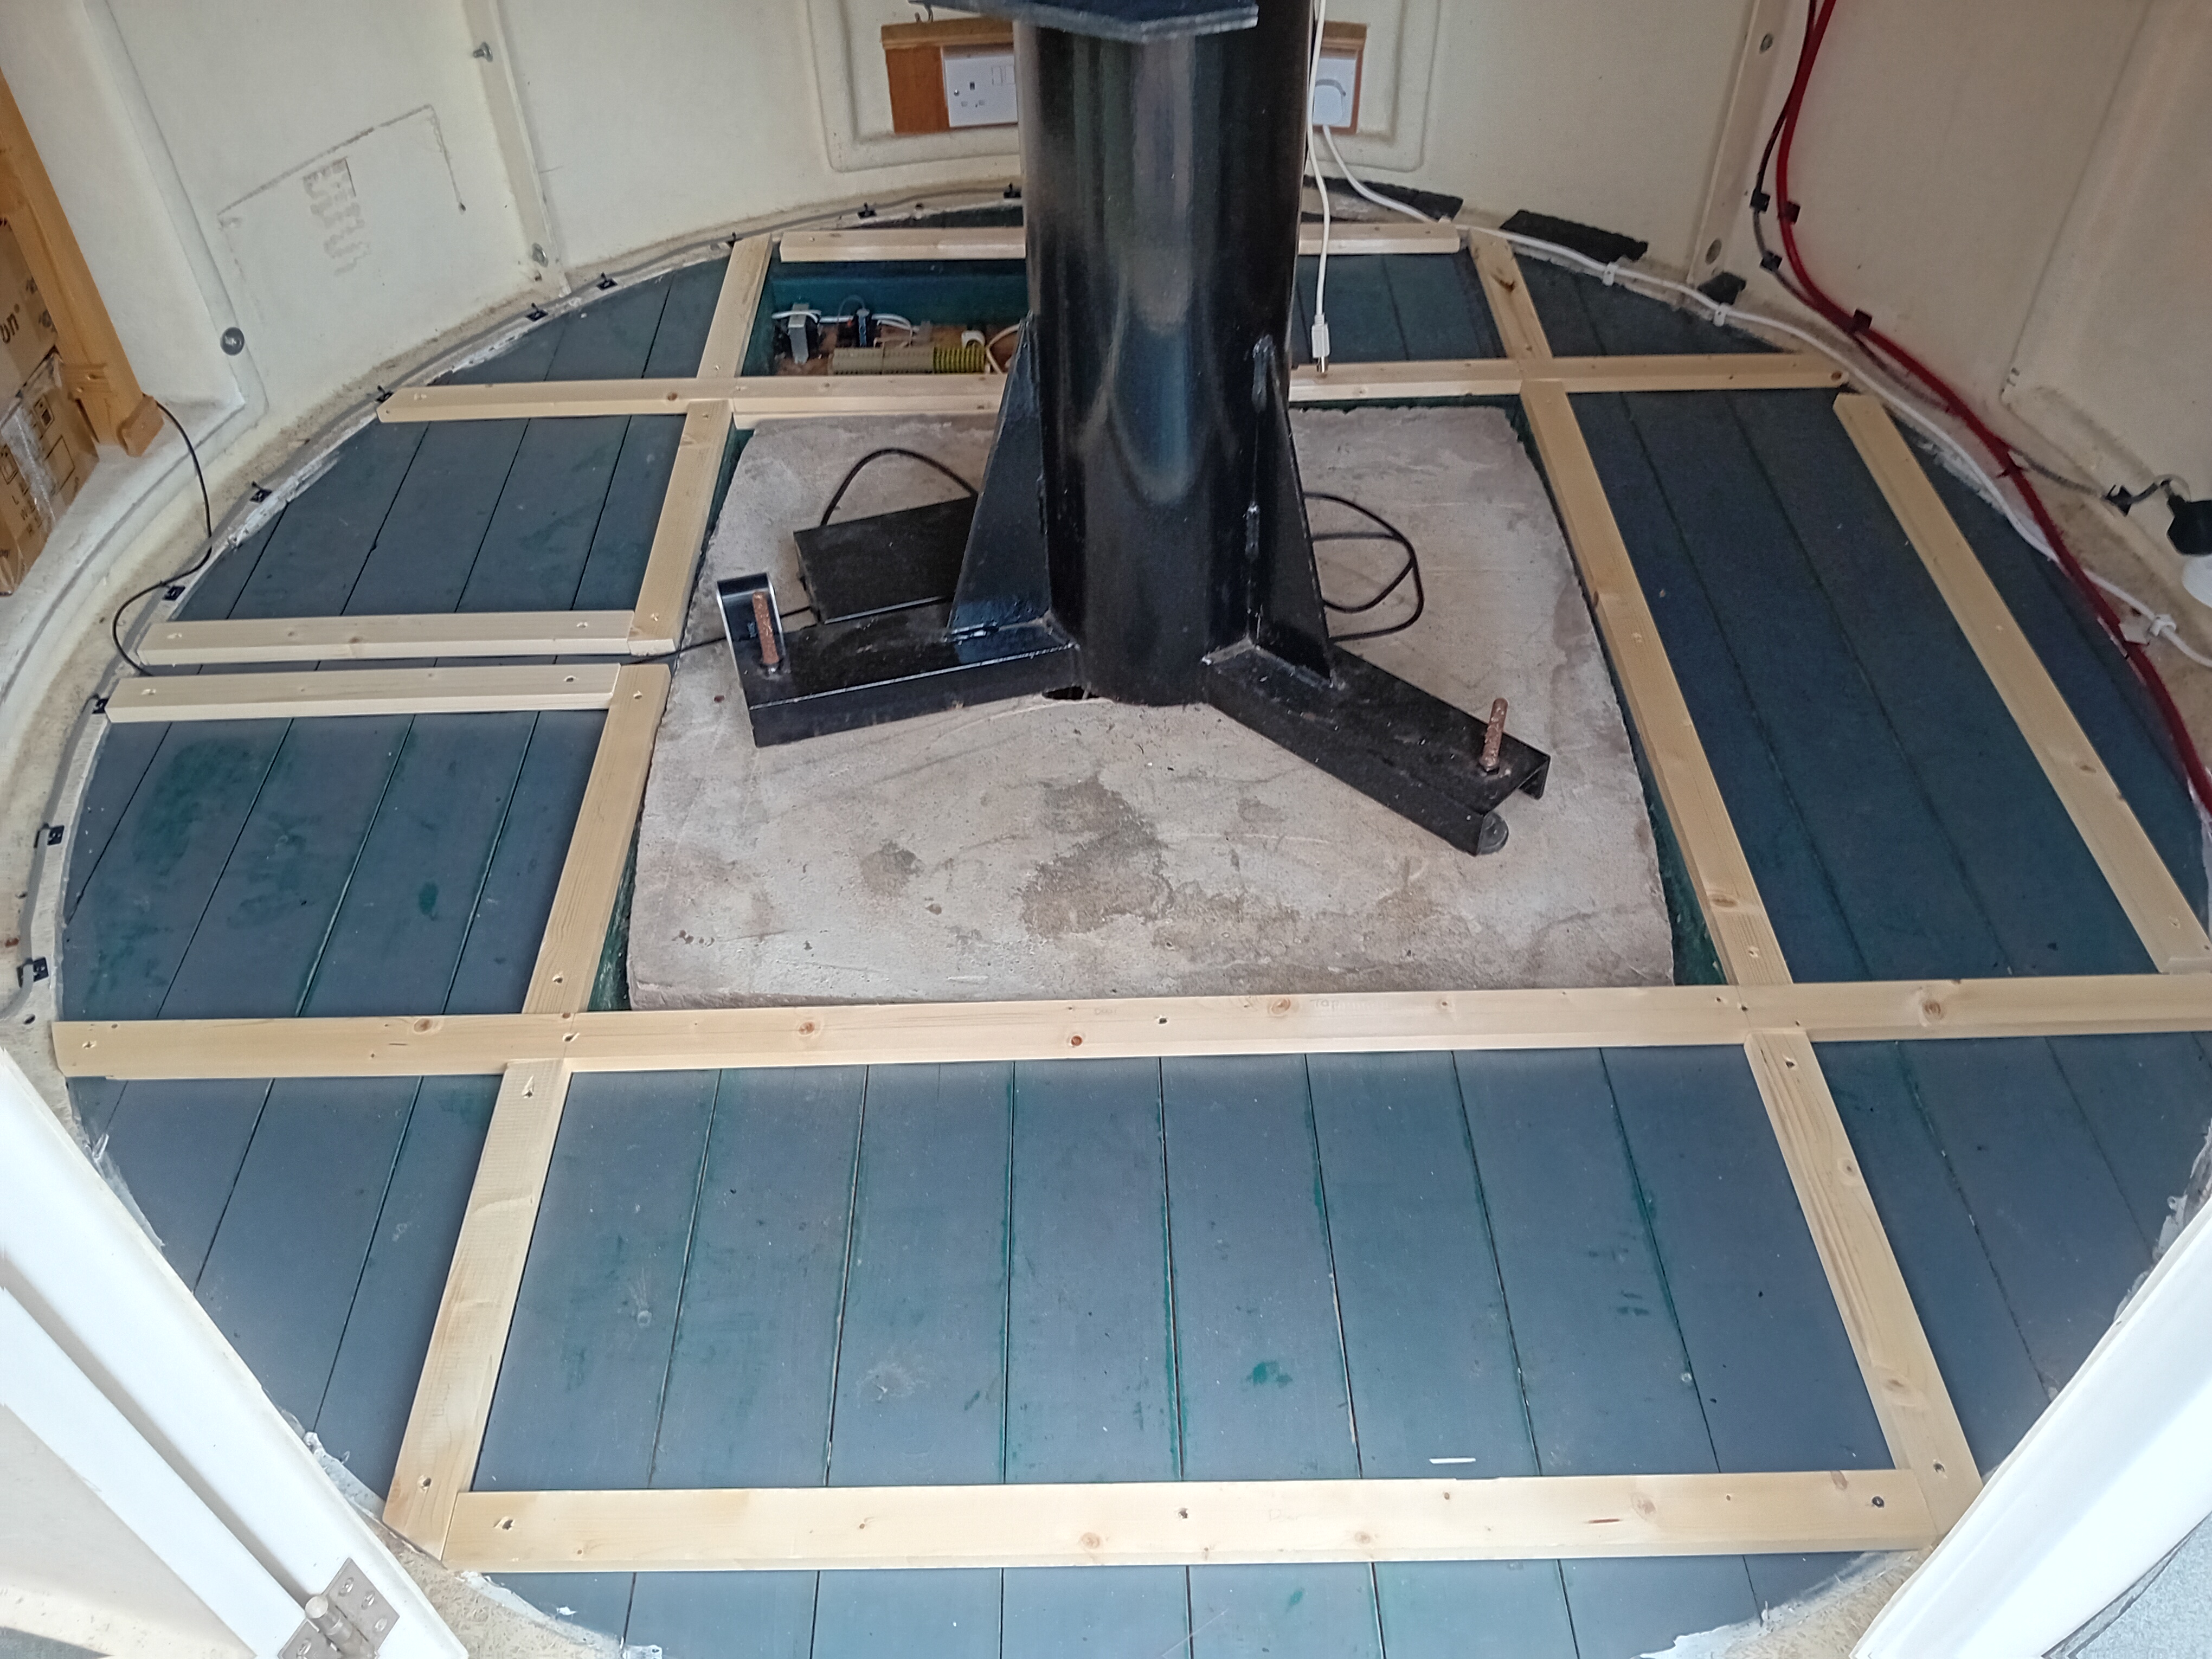
This photo shows the framework that I put down to support the floor. The timber is 18mm high x 44mm wide (various lengths of course). I left a gap at the left to get the USB cable up to the pod where I use the laptop.
One other advantage of this is that I can now route cables under the floor so that they do not present a trip hazard.
Once the framework was in place (that took a day's work with lots of measuring, cutting and trial fitting, before it was complete), it was time for fitting floor panels (using 12mm plywood).
I actually used the rubber floor tiles to get the shapes for the floor panels correct. But it still took lots of trials, measuring and cutting to get every panel to fit in a specific place.
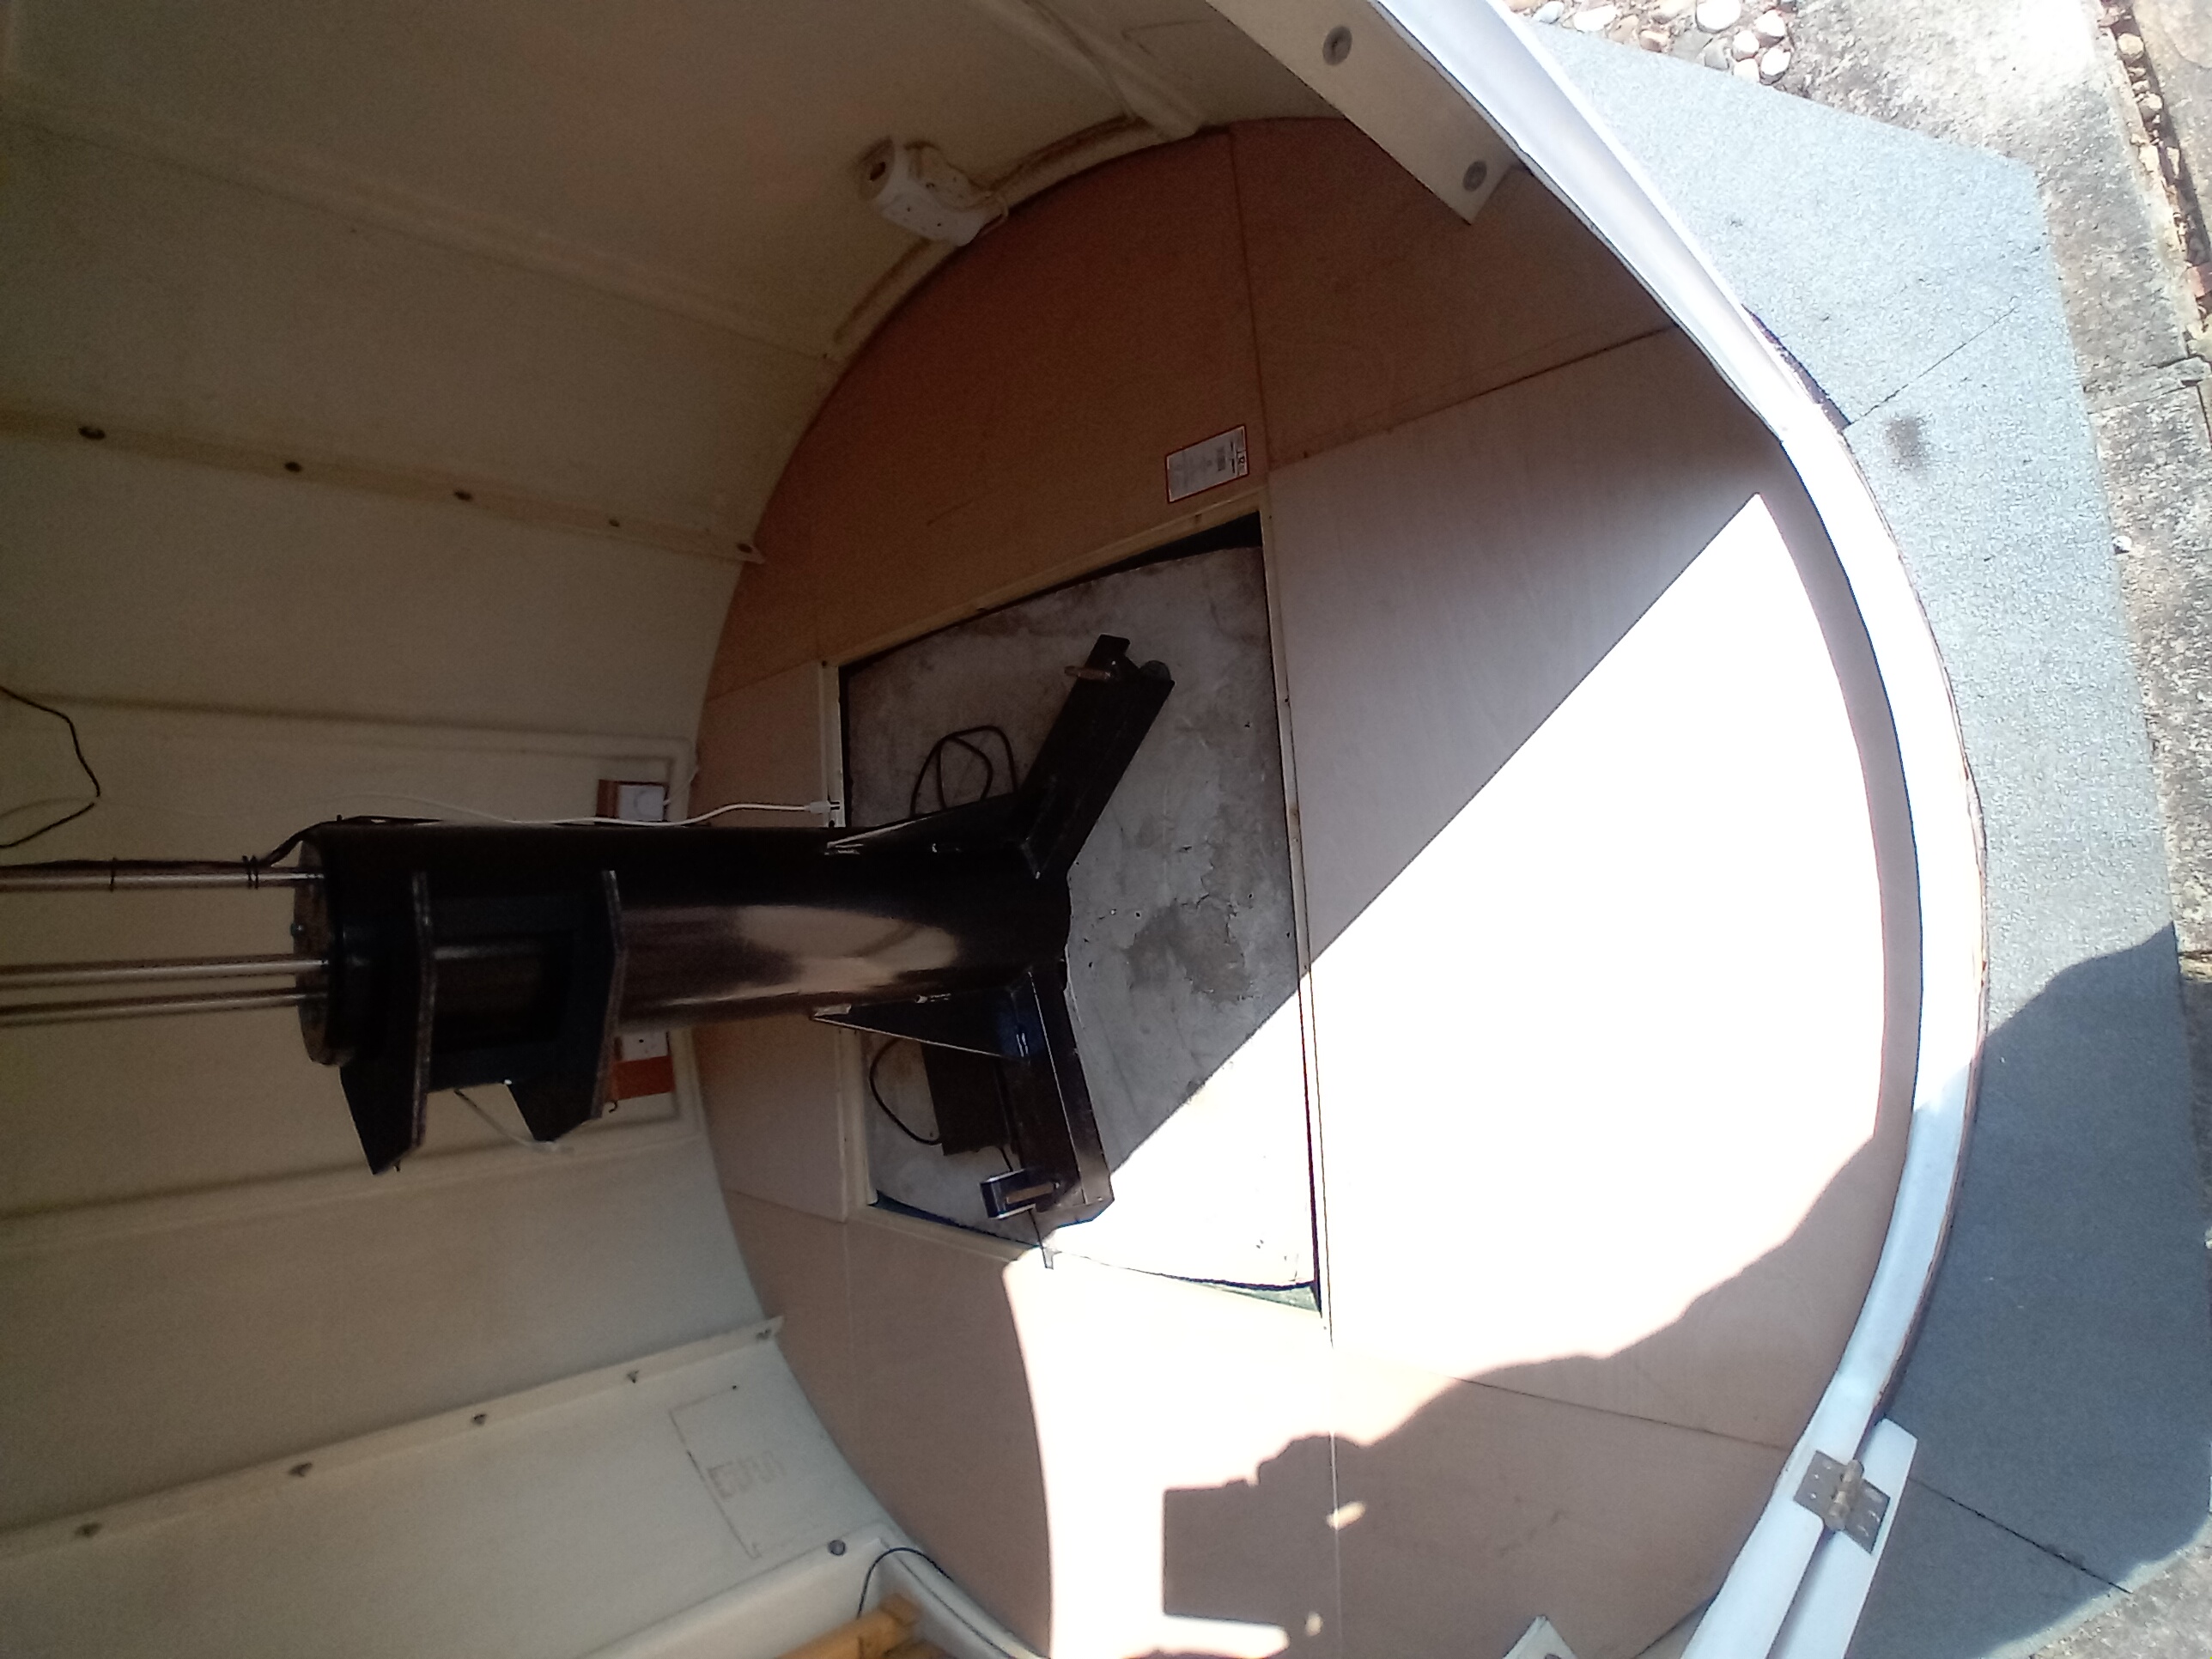
So here's a view from the doorway with the floor panels all in place and screwed down.
As you can see it was a sunny day and the sun was shining right into the doorway, so it's a bit contrasty. But you can see the general principle - 8 panels altogether, 4 in the corners and 4 along the sides.
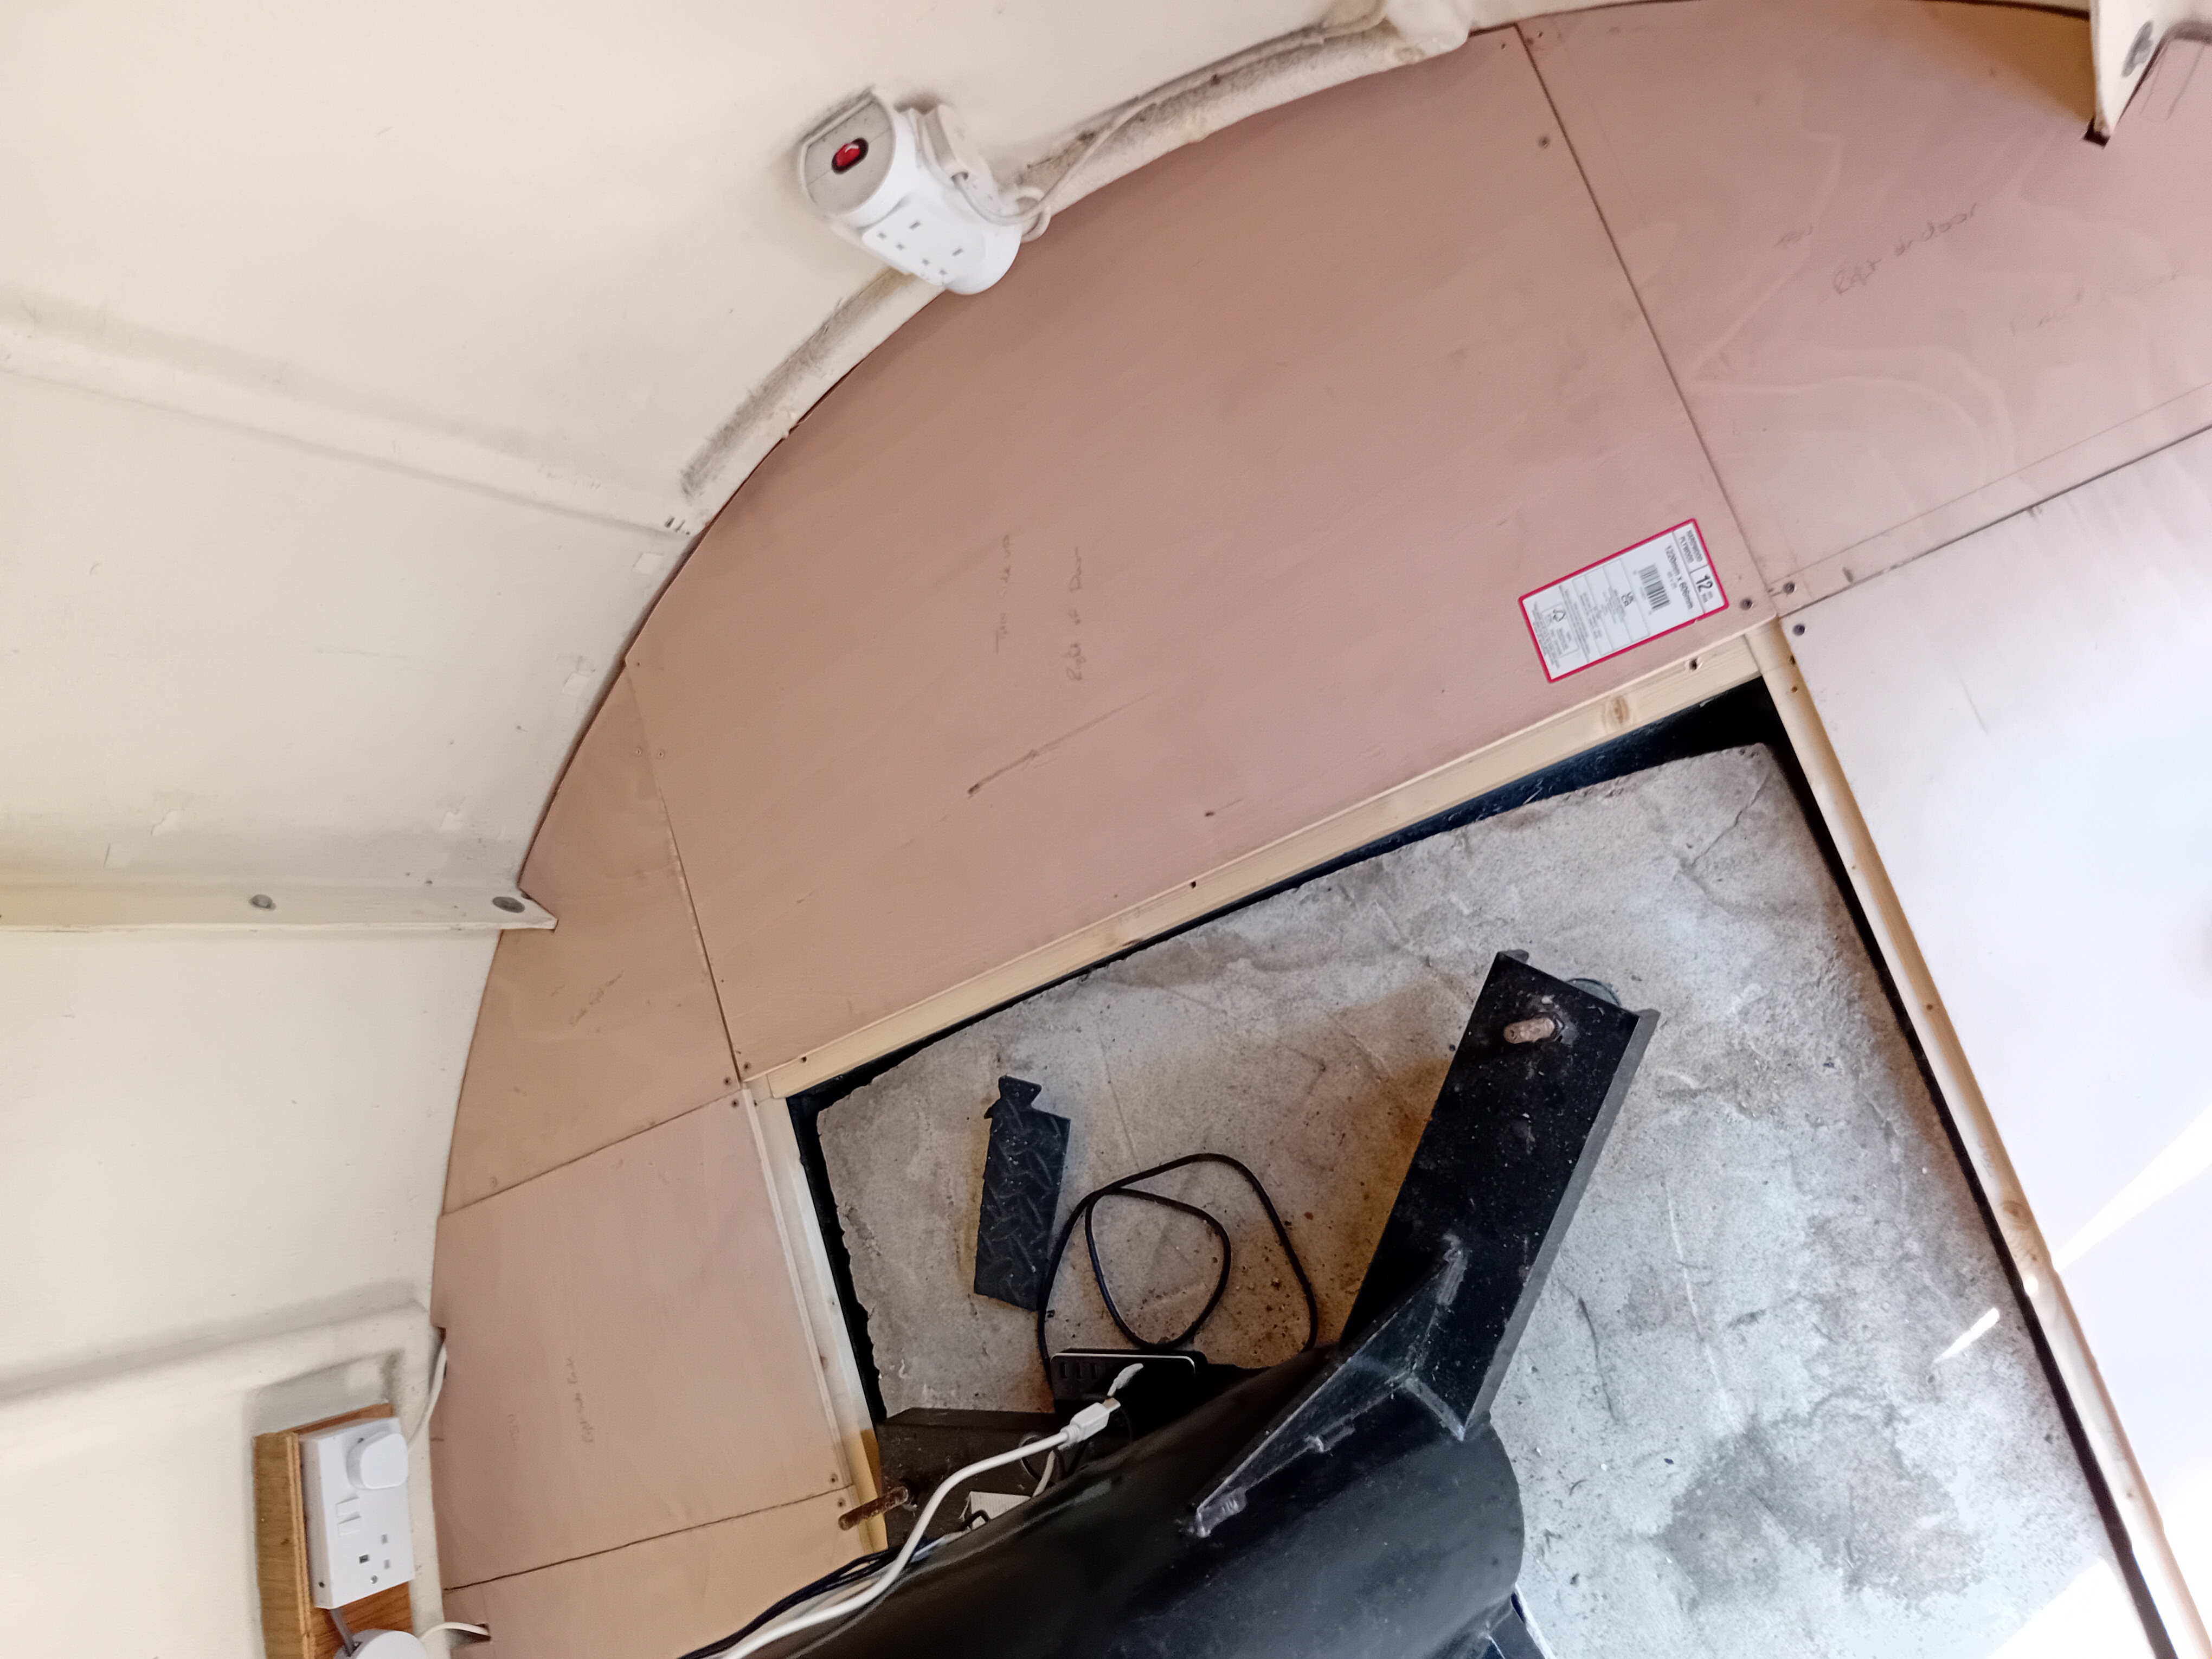
I actually decided to split the "east" panel to avoid having to lift a large panel to get at the junction box I designed into the floor of the original build.
You can see that in this view from just inside the doorway (top left).

Here's another view from the North side of the observatory.
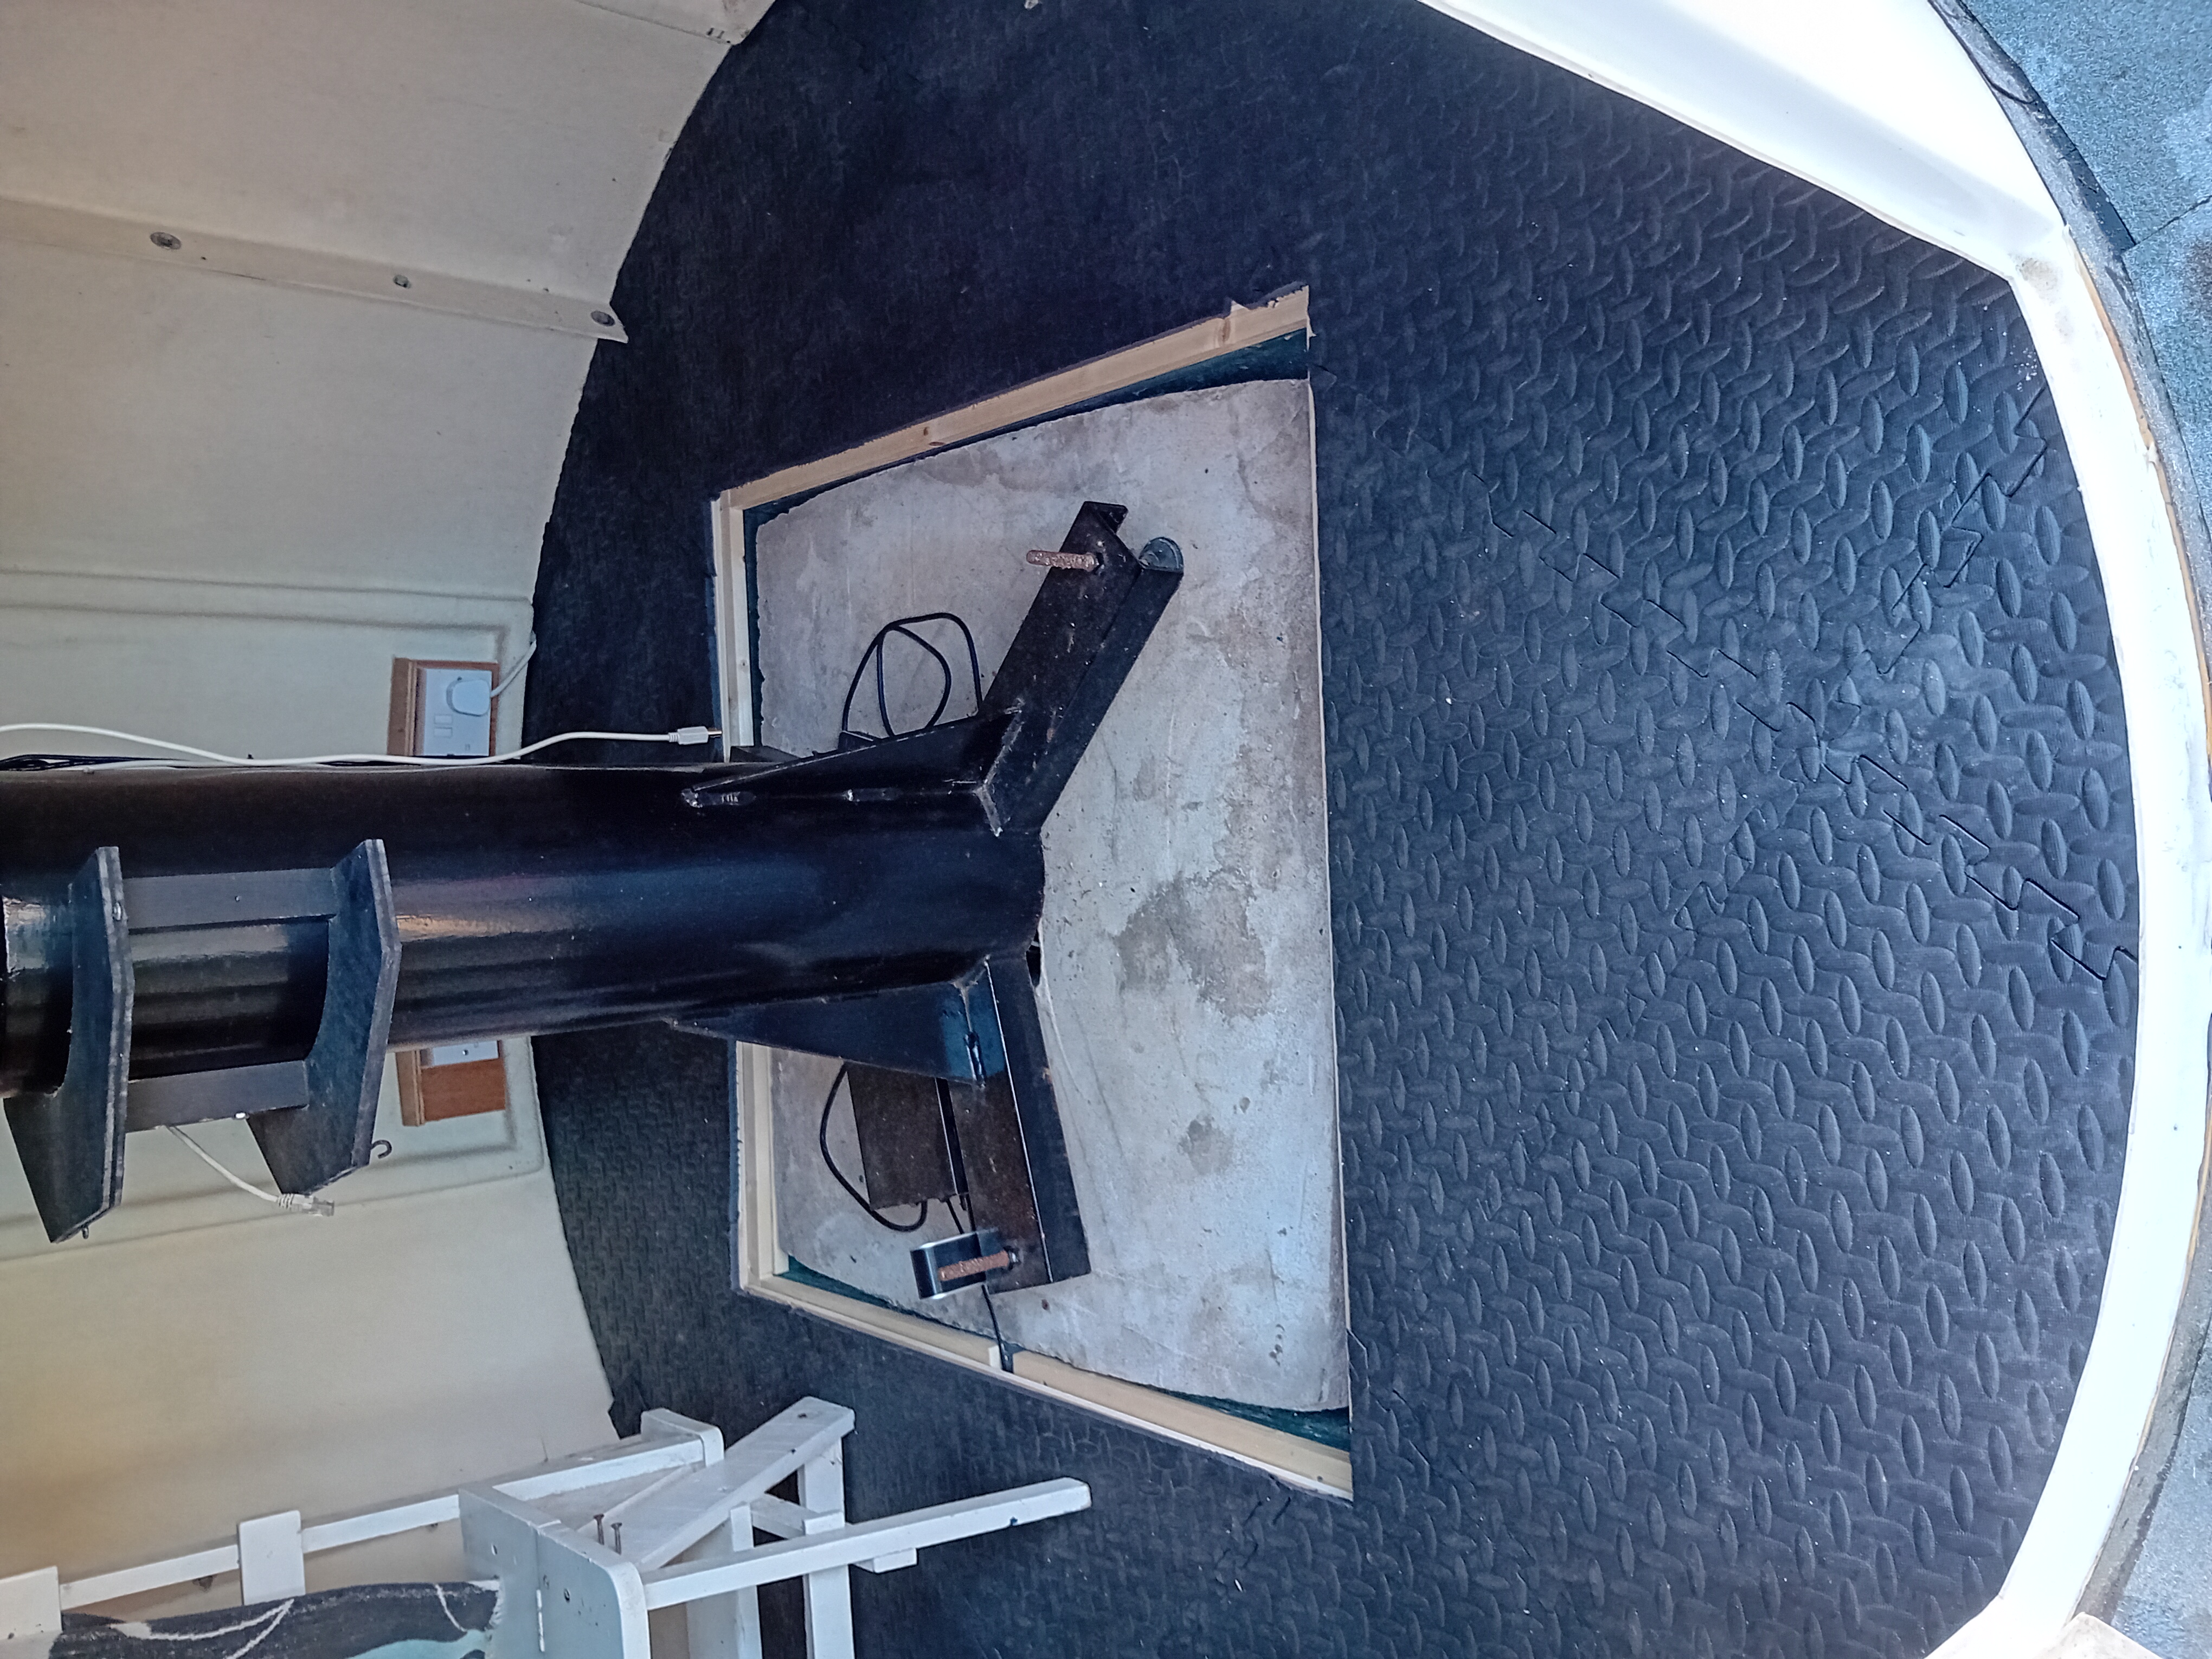
And here it is completed.
The cunning plan came to fruition, so now Cymbeline Observatory has a false floor and hopefully no more bad condensation.
And the rubber matting is nicely laid in place.This ensures that any dropped equipment is likely to survive the fall.
The place actually feels a lot cosier too.