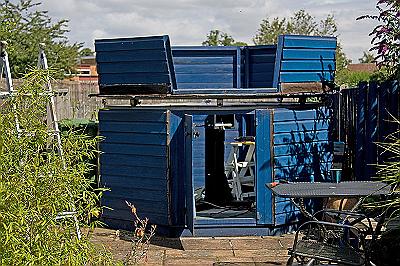
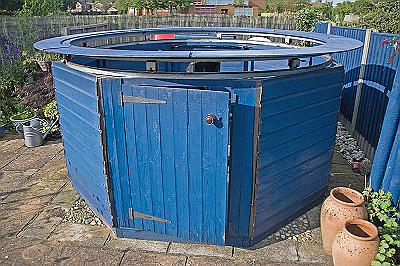
If you've visited the Shutter Makeover page you'll remember how the weather and gravity got the better of the original shutters. Well gravity finally got to the roof too and the sagging caused the two front panels to start a leaning panel job.
This can really be well seen in this shot which was taken just after I took the shutters and roof off.
This sagging is the sole reason for replacing the top with a fibreglass dome.
I spent several months looking for a suitable dome of the correct size for the observatory and none of the commercial domes currently on the market fitted the bill. They were either too small (e.g. 2.1 m) or too big (e.g. 2.7m). There are some very nice domes out there, but you'll pay a premium for a lot of them, some from the USA were going to be over £12,000. I considered a Sirius Dome for quite a long time, but that was going to cost me nearly £5000 by the time i'd imported it from Australia. And then in the April edition of the BAA Journal there was an advert for a 2.7m (OK , I know I already said one this size was too big) dome for £450, read on...
...I got in touch with the advertiser and received this photo by return.I was off for a viewing as soon as I could.
To cut a long story short, I bought the dome, a week later it had been dismantled and taken down and replaced with a Pulsar Observatories motorised dome. Two weeks later I hired a long wheelbase Iveco van and spent a very enjoyable day playing at white van man, collected the dome (which fitted very nicely in the back of the van) and brought it home. It went into the garage pending erection.
Then the weather turned into summer (i.e. not a dry day or a period of dry days to be had for doing the job), the first opportunity for dome erection came in June, two very nice weeks, but I was in Glasgow working. Then....Friday 7th August to Sunday 9th August (2009) was forecast to be dry.
Hooray, so the project was started...
Friday morning the observatory was cleared out and I started to take the old "dome" down.
This is a photograph of the shutters and roof panel after they had been removed. The side walls also came off really easily (but then I had designed the original structure to be able to come apart easily for moving if needed).
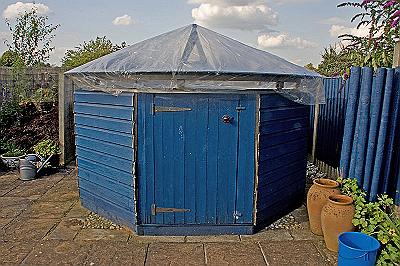
So here it is without a "dome" ready for the new one. I never really thought I'd see it like this again.
.
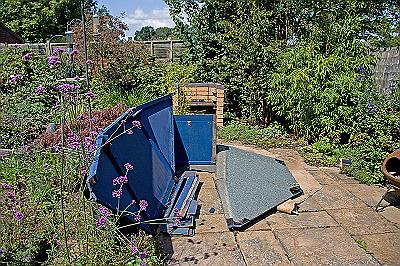
The new dome is larger than the old one so it needs a new supporting structure,. I'd made a ring out of three layers of 9mm plywood to do this. This would also be used to attach a skirt to keep weather out like the old design.
That is enough work for Friday, so it is prepared for overnight storage by covering it in a plastic dust sheet just in case it rained...best to be prepared in England.
Saturday morning I did some painting inside and a further coat on the support ring and then Saturday afternoon, my brother, his wife and Bob (from Dunchurch Photographic Society) came round to assist in putting the dome up. It was too big to go down the side of the house so it had to go over the garage, but once we'd done that it went on really nicely. My dad came round later and we put the skirt on. It looks a lot different.
Saturday evening and the back is on too, time for a cold Gin and Tonic.
Sunday morning and my dad and brother came round to help finish the job off by putting the shutters on. This was the only stage where we hit any snags, but after half an hour of discussion and some dismantling of shutter slide rails it all went together very nicely.
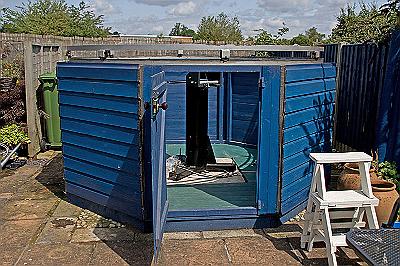
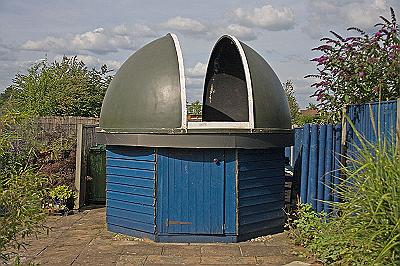
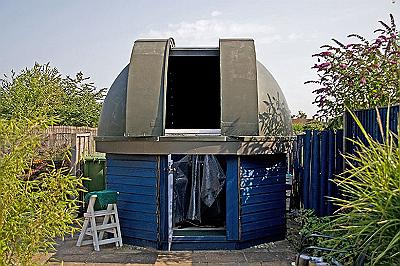
This show the shutters open...
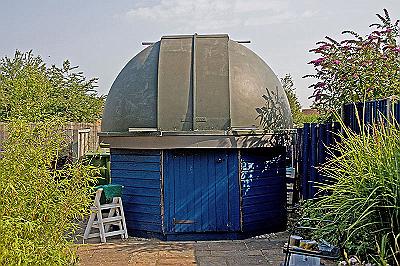
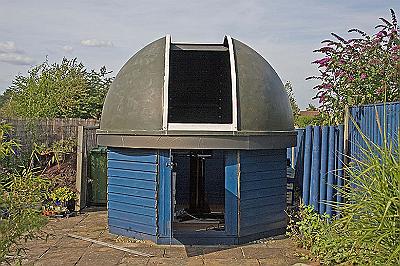
...and this show them closed. We'd got this far by 10:30 a.m on Sunday.
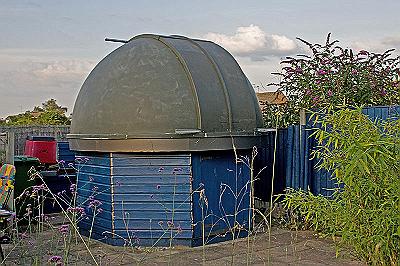
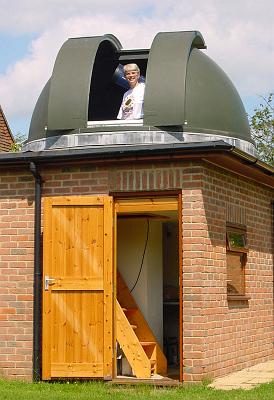
And finally here is another view showing Cymbeline Observatory with a proper dome. I gave it a new paint job inside, and will do the outside weather permitting in the next weeks.
Job done, great!!!!!
I'm thinking of renaming it Dalek Observatory now.